

 Mon-Fri: 8:30-5:00
 #7 3185 Via Centrale, Kelowna BC


Changing listings that were once active listings within your website to show as SOLD listings in 7 easy steps. Follow through this simple article to republish your listings in a SOLD state!
STEP ONE:
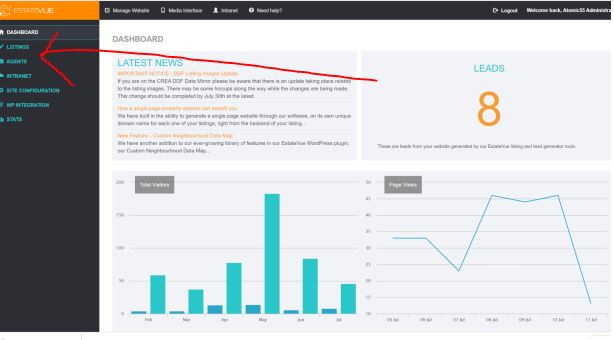
● Login to your EstateVue admin panel
STEP TWO:
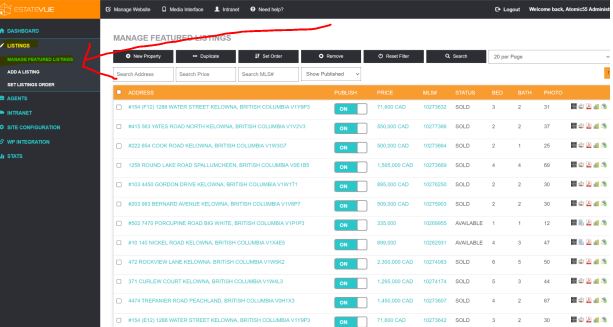
● Click Listings on the left-hand side menu
● Click Manage Featured Listings
STEP THREE:
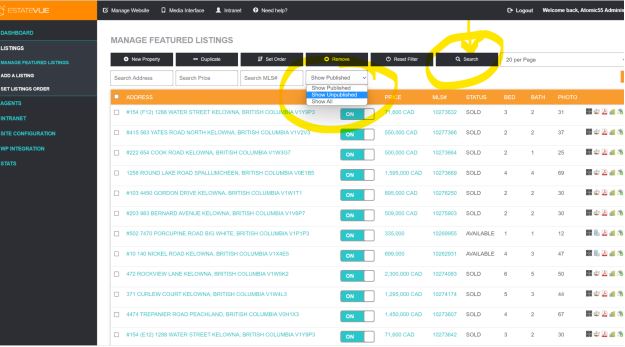
● Click the Dropdown and select Show Unpublished
● Click the Search Button to display
STEP FOUR:
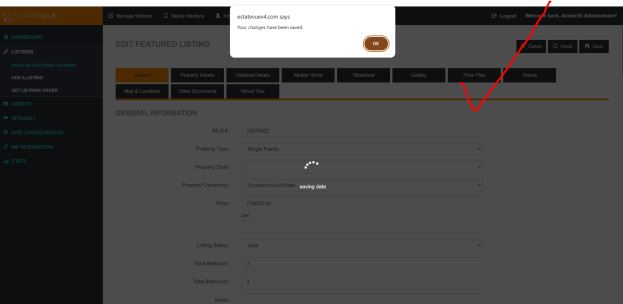
● Find the listing address you want to change the status for and click to open the
listing
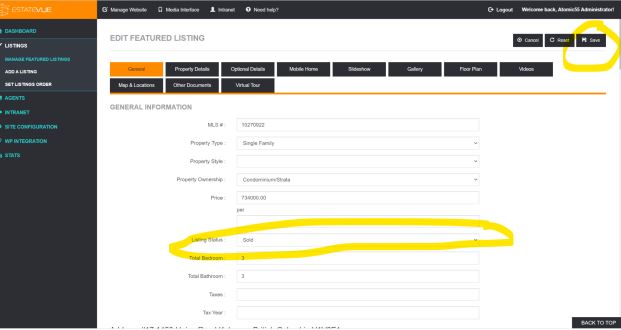
● Toggle the listing status in the General Information Status box to the status you
want to display (SOLD)
● IMPORTANT - Click the SAVE button in the top right corner and wait for it to say
it has been saved
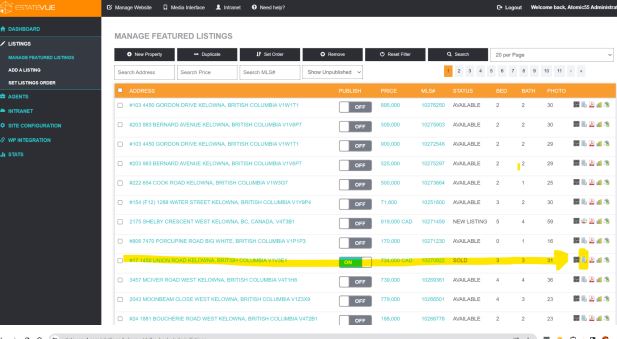
STEP FIVE:
● Click Managed Listings on the left side of the menu again
● Click Show Unpublished from the Dropdown menu again and click Search to
display the results again
● Find the property address that you just changed the status to SOLD on and
toggle the button to ON from OFF
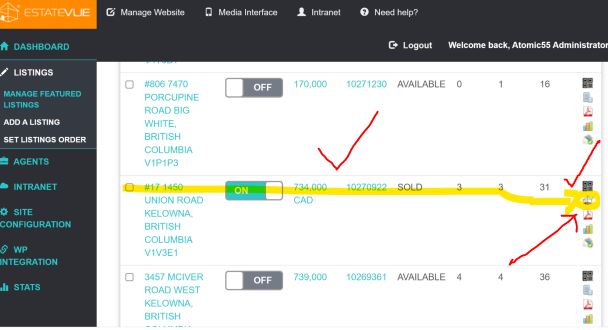
STEP SIX:
This is the final step from the EstateVue Admin and is IMPORTANT. Skipping this step
erases your changes. We have to turn off the listing from the live data feed updates or it
will wipe the changes from your front end and unpublish them each time the data is
synced.
● Click the Set as Manual/Synced Listing Icon to the far right
● You’ll notice it will change to the EstateVue House logo

STEP SEVEN:
Log in to your WordPress website and Delete the EstateVue Cache so that the changes
are immediately displayed on your website. You may need to clear your local cache as
well.